In this tutorial, I am going to show you how to make Google Assistant based scrolling LED display.that is we can change the scrolling text with the help of google assistant
So let's start
Please watch the video till the end to get some ideas
Things needed for this
Nodemcu
8*8led matrix
Connections
First, go to io.adafruit.com
Then sign up with your Google account
then click on Create New Block
then enter LED Matrix And click Create then select LED Matrix and click Next then Create Block.
After that go back to your dashboard and select View AIO Key and copy that key
Now open the code and paste the io key do the same for username.
Also, give SSID and password there.
After that upload Sketch to nodemcu
IFTTT AND GOOGLE ASSISTANT
First, go to ifttt.com
Sign up with your Google account (the same account that used in adafruit)
After that click on create
Then click on first + icon and search Google Assistant and select it then click Connect select account and allow it
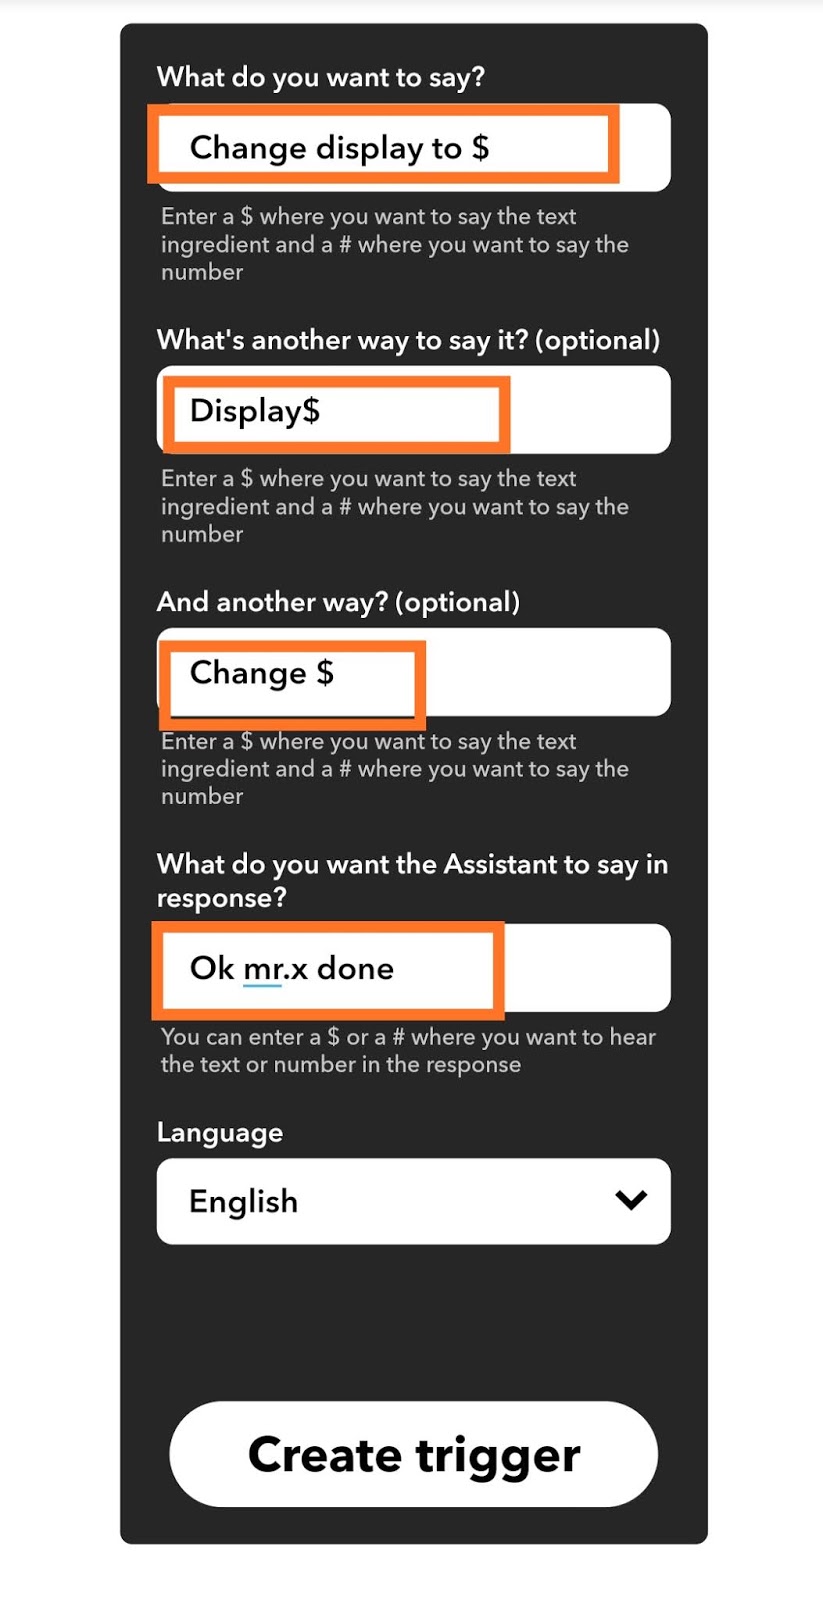
Then select Say a Phrase with Text Ingredient and here type
Then u need to give the trigger commands do it as you wish
"change matrix to $" so whenever you will say change matrix to and whatever will be after to(i.e in place of $ symbol), will be displayed.
You can select multiple triggers like that.
Next, select what assistant will reply.
Then select Create Trigger.
That's all about the software side


Where is the code
ReplyDelete